vHelix - Free-form DNA-nanostructure design
Install Instructions for Windows
-The windows build are compiled using Microsoft Visual Studio. This requires that you install the Microsoft Visual C++ Redistributable Package (x64) found at https://support.microsoft.com/en-us/help/2977003/the-latest-supported-visual-c-downloads (Maya 2019), of for maya < 2019 available at http://www.microsoft.com/en-us/download/details.aspx?id=40784
- Copy the included 'vHelix.mll' to your Autodesk Maya
'bin\plug-ins' directory, for example under the path:
'C:\Program Files\Autodesk\Maya2016\bin\plug-ins'
- Start Autodesk Maya
- In Maya, select 'Window' > 'Settings/Preferences' > 'Plug-in Manager'
- In the newly opened dialog window, locate the 'vHelix.mll' and make
sure the checkbox 'Loaded' is enabled
- If you want the plug-in to automatically load upon starting
Autodesk Maya, make sure the 'Auto load' is enabled
- The plug-in is now loaded and a new menu item named 'Helix' should have
appeared in the Maya main window
Maya 2018-2019
In maya 2018 "legacy viewport" needs to be activated for vHelix to function properly:
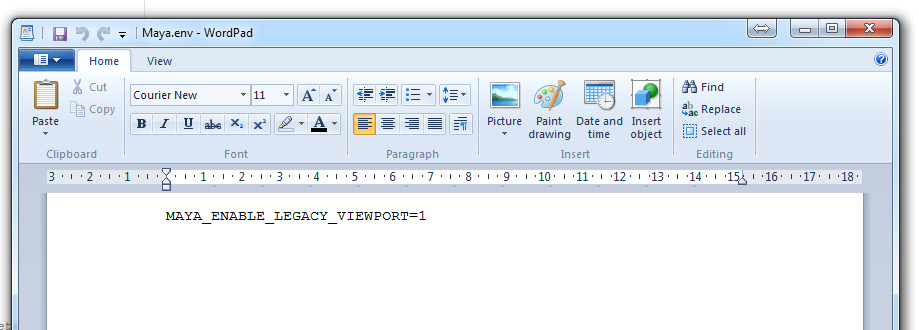
- It first needs to be activated in your enviroment file (Maya.env), normally found at "Documents\maya\2018". Open Maya.env in a text editor and add the line "MAYA_ENABLE_LEGACY_VIEWPORT=1"
- In Maya, select 'Window' > 'Settings/Preferences' > 'Preferences'
- Under the category 'Display' change 'default viewport' to 'Legacy Default Viewport'
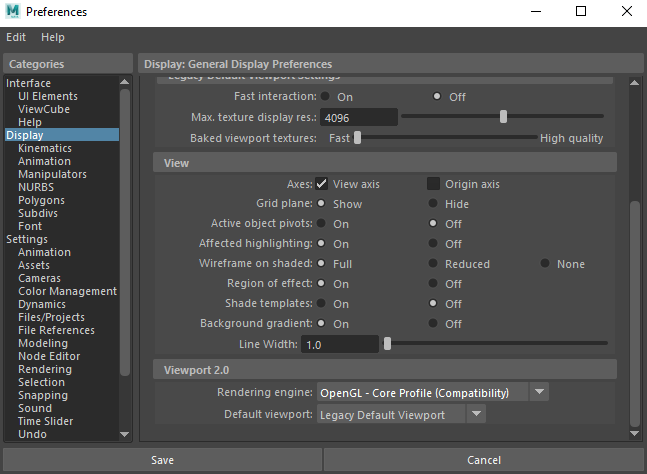
- You may need to restart Maya for this change to take effect.
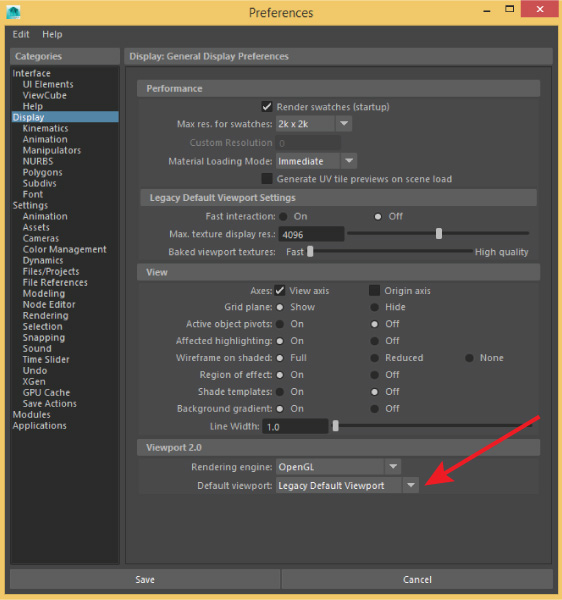
Maya 2016
In maya 2016 "legacy viewport" needs to be activated for vHelix to function properly:
- In Maya, select 'Window' > 'Settings/Preferences' > 'Preferences'
- Under the category 'Display' change 'default viewport' to 'Legacy Default Viewport'
- You may need to restart Maya for this change to take effect.